Help:Editing: Difference between revisions
| (One intermediate revision by the same user not shown) | |||
| Line 39: | Line 39: | ||
==Highlighting sourcecode== | ==Highlighting sourcecode== | ||
MediaWiki can do syntax highlighting for over a dozen programming languages, including C, Python, Perl, Fortran, and C++. Just surround the code with a <tt>source</tt> tag of the name of the language in the variable <tt>lang</tt>. For example: | |||
<pre> | <pre> | ||
<python> | <source lang="python"> | ||
import re | import re | ||
| Line 54: | Line 54: | ||
iface, addr = temp[0], temp[4] | iface, addr = temp[0], temp[4] | ||
nodes.append([node, iface, addr]) | nodes.append([node, iface, addr]) | ||
</ | </source> | ||
</pre> | </pre> | ||
Gives you | Gives you | ||
<python> | <source lang="python"> | ||
import re | import re | ||
| Line 71: | Line 71: | ||
iface, addr = temp[0], temp[4] | iface, addr = temp[0], temp[4] | ||
nodes.append([node, iface, addr]) | nodes.append([node, iface, addr]) | ||
</ | </source> | ||
==Inserting Gnuplot graphs== | ==Inserting Gnuplot graphs== | ||
Latest revision as of 15:46, 8 December 2008
This page should tell you how to work with this Wiki – it's not complicated, promise! (In fact, the whole point of a wiki is to make it as easy for the user as possible to document whatever there is worth documenting).
Editing an existing page
- Select the Edit link at the top.
- Type or simply copy and paste text, eg from your editor, shell, or an email, and use the preview button.
- Once it looks sort-of right commit your changes by clicking save page.
The Media Wiki page has a comprehensive list of the Wiki markup but you can also look at the code of existing pages (edit the page but don't save it) or use the formatting buttons at the top of your editing box.
The most important thing is just to put something on the page and not to worry too much about formatting. If in doubt simply leave one initial space and everything gets formatted verbatim; anything resembling an URL will be turned into a link (or enclose it in '[' and ']').
Editing a new page
If you click on a red link then you enter a non-existing page. This is not bad: Simply start editing it and write it yourself. You can't make mistakes. Just do it.
Creating a new page
To make a non-existing page you simply insert the link into an existing page, it appears in red, you click it and then edit it.
Signing your name
Sometimes this is useful: three tildes ~~~ signs your name like this: Oliver; four ~~~~ dates it too: Oliver 18:32, 24 January 2006 (EST)
Categories
Categories in MediaWiki provide automatic indexes that are useful as tables of contents. See the Special Page Special:Categories for a list of all defined categories.
- You define a category by adding one or more special tags at the end of a page: add [[Category:Category name]] to the page's wikitext source. For instance, add to page that describes analysis scripts for Charmm
[[Category:Hippo]]
[[Category:Analysis]]
- as the last two lines. This will implicitly define the categories Category:Analysis and Category:Hippo.
- The category pages can also be edited. In addition, the wiki software adds an alphabetically sorted list of all pages in the category. This makes a category useful as an entry point into a subject.
- One must edit a category page for the wiki to create the indexed list (even if it is just an empty edit).
- It is also possible to add another category to a category page: This will turn this category in a subcategory on the other category page.
- In order to reference a category within a page as a normal wiki link (without adding the page to the category) prefix the link name with a colon. For example: [[:Category:Analysis]].
Page maintenance
Redirection
A 'symbolic link' to another pages is created with the REDIRECT command:
#REDIRECT [[page]]
Highlighting sourcecode
MediaWiki can do syntax highlighting for over a dozen programming languages, including C, Python, Perl, Fortran, and C++. Just surround the code with a source tag of the name of the language in the variable lang. For example:
<source lang="python">
import re

lines = file("ifconf.log").readlines()
l_iter = iter(lines)

nodes = []
for l in l_iter:
  if l[:7] == "compute":
    node = l.split('.')[0]
    temp = l_iter.next().split()
    iface, addr = temp[0], temp[4]
    nodes.append([node, iface, addr])
</source>
Gives you
import re

lines = file("ifconf.log").readlines()
l_iter = iter(lines)

nodes = []
for l in l_iter:
  if l[:7] == "compute":
    node = l.split('.')[0]
    temp = l_iter.next().split()
    iface, addr = temp[0], temp[4]
    nodes.append([node, iface, addr])
Inserting Gnuplot graphs
You can insert gnuplot graphs directly into mediawiki by using the gnuplot tag. For example:
<gnuplot>
 set output 'func_approx.png'
  plot '-' using 1:2 t 'quadratic approximation' with linesp lt 1 lw 3, \
  '-' using 1:2 t 'cubic approximation' with linesp lt 2 lw 3
  1 2
  2 4
  3 8
  4 16
  e
  1 3
  2 9
  3 27
  4 81
  e
 </gnuplot>
Gives you the following: <gnuplot>
set output 'func_approx.png'
 plot '-' using 1:2 t 'quadratic approximation' with linesp lt 1 lw 3, \
 '-' using 1:2 t 'cubic approximation' with linesp lt 2 lw 3
 1 2
 2 4
 3 8
 4 16
 e
 1 3
 2 9
 3 27
 4 81
 e
</gnuplot>
Adding bibliographic references (specifically PubMed)
You can insert bibliographic references into pages by using the <cite> and <biblio> tags. This uses the PubMed id number (pmid) found at the bottom of the abstract listing for a particular article. Mediawiki will go to PubMed and pull the citation information for the reference. Using the key in front of the pmid assignment within the <cite> tag (see example below) gives you a reference to the article within the current page. For example, although you can obmit the pmid and simply format the reference yourself.
Recent papers from the Woolf lab <cite>jcp2005 proteins2005 jcp2004</cite>:
===Bibliography===
<biblio>
#jcp2005 pmid=15847458
#proteins2005 pmid=15828005
#jcp2004 pmid=15634036
</biblio>
Will give you this: Recent papers from the Woolf lab jcp2005 proteins2005 jcp2004:
Bibliography
<biblio>
- jcp2005 pmid=15847458
- proteins2005 pmid=15828005
- jcp2004 pmid=15634036
</biblio>
Images
The following shows two methods of how to incorporate an image in a wiki page.
Upload
The image is uploaded to the webserver and resides in the wiki (somewhere... you don't need to know where, it's a secret)
- first upload it (use the link in the toolbox on the left)
- enter a wiki link such as [[Image:Gbim.jpg|200px]] into the text.

An exhaustive description of the image capabilities are discussed in the Wikipedia Extended Image Syntax. Most importantly, if you want to change the size of the image, add a size option |sizepx option (|200px in the example above).
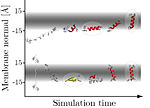
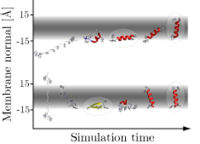
The new version of MediaWiki gives you a plethora of options to add captions, float the image to left or right, change sizes, show it as a (fast) thumbnail, ... [[Image:Gbim.jpg|thumb|right|150px|Insertion of a peptide into a Generalized Born implicit membrane.]] gives a thumbnail image floating on the right hand side.
Styles
One can directly edit the Cascading Style Sheets (CSS). The most important one is Mediawiki:Common.css – be careful, all changes directly affect every user.
See the Mediawiki Stylesheet Manual for details and there is also the useful Mediawiki FAQ on customizing the Interface. Wikipedia's Help:User_style has a lot of howto information.
Links
If you want to gain an in-depth knowledge of working with this Wiki then have a look at these links:
Wikipedia edit help documents
- Wikipedia's full listing of wiki editing commands (make sure you come back here to edit... otherwise you will be editing Wikipedia)
- Wikipedia Extended Image Syntax for all your image inclusion needs
- Syntax of Table commands
MediaWiki documents
The Biowerkzeug Wiki uses the MediaWiki software. For more on MediaWiki see the following links:
